
Bollywood has never gotten so much love from Kodi devs as it does now. Since 2016, a dozen of new Kodi addons have appeared, and this is a guide on how to install Movierulz, one of the most recent. Movierulz is a movie addon that can be found in the Reasons repository. From 2016 to 2019, the addon focuses on Bollywood and Hollywood films. To make navigating easier, each movie genre is organized by release year. If you enjoy Indian films, this is an add-on that you should install on your Kodi. We’ll show you how to install Movierulz Kodi Addon in just a few minutes in today’s article.
Before you begin…
It’s vital to note that Movierulz is not an official Kodi addon before installing it. Copyright agents have recently targeted third-party Kodi addons because they encourage access to unlicensed content. While we do not encourage the consumption of such content, we do recommend that you remain vigilant at all times.
The only way to do so is through the use of a virtual private network (VPN) (VPN). A VPN encrypts your data and sends it through a secure tunnel to a server of your choosing. This new server spoofs your IP address and creates a new online persona for you.
This manner, neither your ISP nor the government can spy on you, nor can your online actions be tracked.
IPVanish is currently the best VPN for Kodi. The VPN provides the most reliable privacy and security on the market, as well as being extremely fast. It’s also registered in a welcoming area and doesn’t maintain any logs. Fortunately, we were able to secure a 65 percent discount for all of our readers, which you may use to stay safe while using Kodi.
Movierulz Kodi Addon Installation
We must install Movierulz from the reasons repository because it is a third-party Kodi addon. To do so, you must first provide your Kodi permission to launch “programs from unknown sources.” To enable unknown sources, go to Add-ons> Settings> Enable Unknown Sources.
The repo and addon can then be installed after that. We’ve broken the process down into sections and included screenshots to make it easier to understand.
- To open the System menu, click the Settings button on the top left side of the Kodi home screen.
- Double-click “Add-Source” in File Manager, then select “Add-Source.”
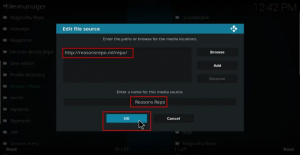
- In the new window that appears, type http://reasonsrepo.ml/repo.
- Name it “Reasons Repo” underneath that. After that, you can click “OK.”

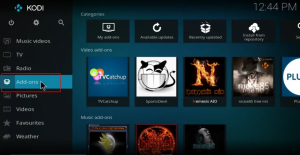
- Click “Add-ons” from the left side menu on the Kodi Home screen.
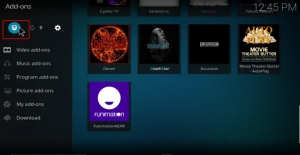
- And Click the open box icon at the top of the menu bar to launch the package installer.
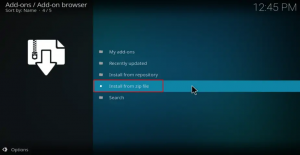
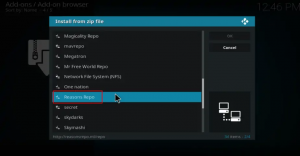
- Choose “Install from Zip File” as your installation method.
- Go to the above-mentioned repo and select it. It will be labeled “Reasons Repo” on the screen.
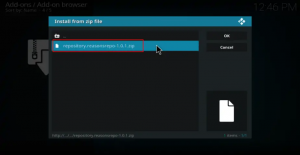
- Go to repository.reasonsrepo-x.x.x.zip and choose it.
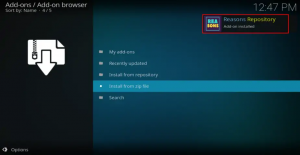
Why Reasons why Repo should be installed right now. Allow for the installation to finish. After that, you’ll get a notification.
Movierulz Kodi Addon Installation
- Next, click “Install from the repository” on the same screen.
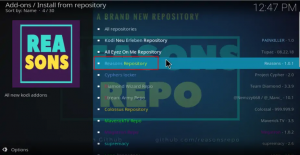
- Choose “Reasons Repository” from the drop-down menu.
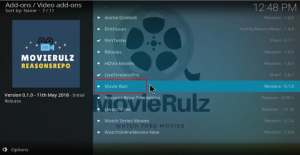
- Pick “Video Add-ons,” then scroll down and click Movierulz.
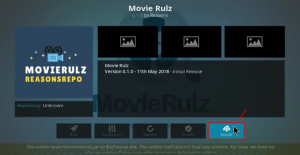
- You’ll now have the choice to “Install.” You’ve got it.
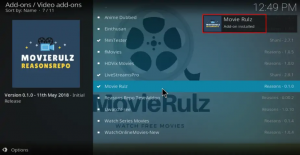
- Movierulz Kodi Addon should now be installed. When it’s ready to use, you’ll receive an email notification.

Conclusion:
Movierulz is one of the newest additions to the collection of addons for watching Bollywood movies for free. The Movierulz plugin is simple to set up. However, before you use the addon to stream anything, make sure you first turn on your IPVanish app and connect to a server (preferably one near you). After that, you may use the Movierulz Kodi addon to watch your favorite Bollywood and Hollywood movies. If you’re not sure about the one we recommended, I hope you enjoyed this tutorial on how to install the Movierulz Kodi addon. If so, please tell your friends about it.


