
You may have seen a blocked Pen drive/USB Flash drive on school or college computers if you are a student. Let’s face it, we’ve all had those moments in our childhood when we tried to connect a USB drive to a computer and the machine failed to recognize it. (How To Enable Or Disable USB Ports In Windows)
When the system administrator shuts the USB ports, this happens. Blocked USB ports are very prevalent at work, college, and school since they prohibit unauthorized USB access. Blocking USB port access is an excellent approach to keep unwanted people from transferring or stealing data from your computer.
In Windows, you can enable or disable USB ports
If you share your computer with others, you should turn off USB ports in Windows 10. In this article, we’ll go through some of the most effective ways to enable and disable USB ports in Windows 10. We’ve listed some of the more effective approaches for enabling below.
The following are five methods for blocking or disabling USB ports on your computer:
- Disabling USB ports by altering or updating registry values.
- Using Device Manager, disable USB ports.
- Remove the USB Mass Storage Drivers from your computer.
- Utilization of third-party software
- Get in touch with Microsoft Support to get it fixed.
So let’s have a look at the five methods for disabling USB ports on a Windows 7/8 computer.
Making Use of Registry Editor
To disable/enable USB Drivers and Mass Storage access using this method, we’ll need to make some adjustments to the Windows registry settings. So, let’s get this party started.
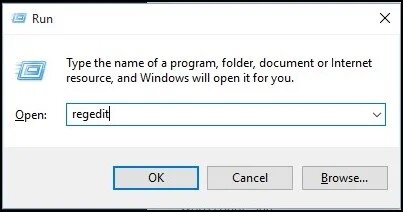
- Go to your desktop and hit the “Win Button + R” combination. Now, input the command “Regedit” and press the “OK” button.

- You will now be directed to a window. As a result, do as instructed.
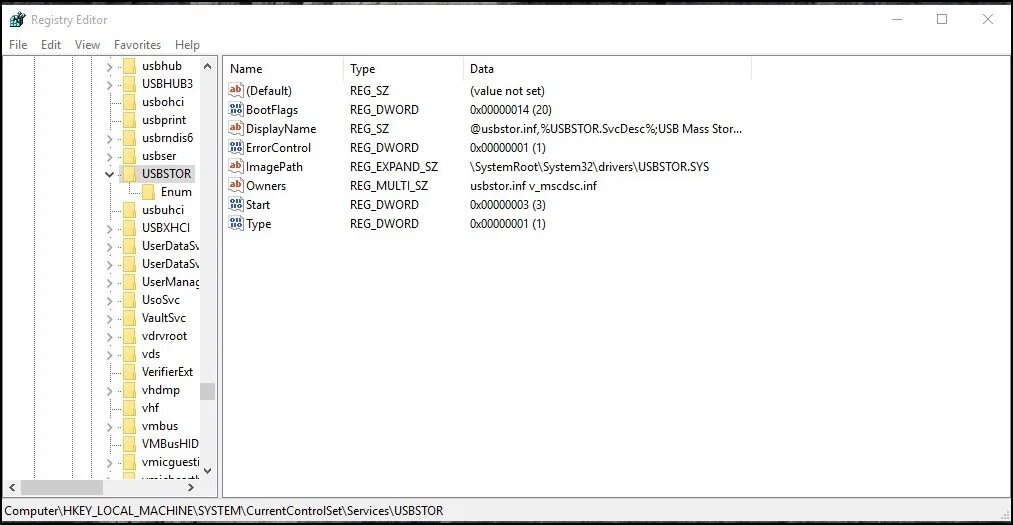
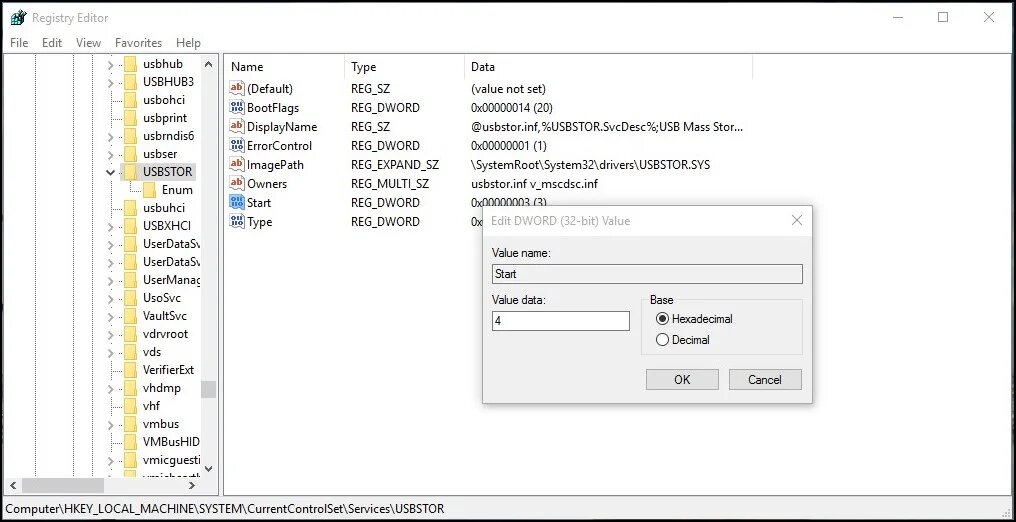
HIKEY_LOCAL_MACHINE -> SYSTEM -> CURRENT CONTROL SET -> SERVICES -> USBSTOR - All you have to do now is locate START in the work area. To disable your USB port, simply update the Value data to “4,” or if you want to enable it again in the future, change it to “3,” but remember to close your Registry Editor after each task or altering the value.
That concludes our discussion. You’ve completed your task. This is how you may utilize the Windows registry in Windows 10 to unblock or ban USB ports.
Device Manager can be used to disable USB ports.
The method described above is ideal for turning off USB ports on computers. If the above approach does not work, you can use this method to disable USB ports using Device Manager.
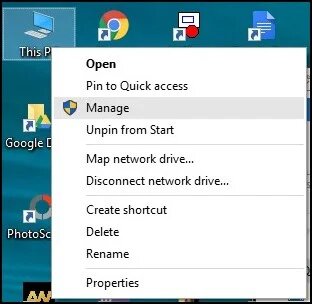
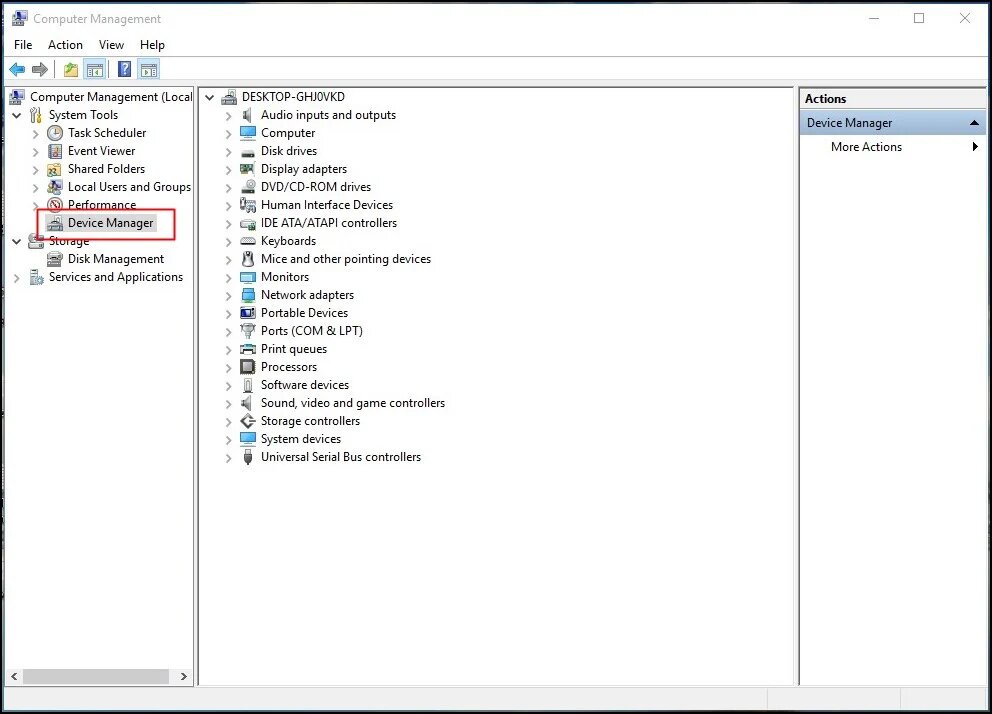
- Select “Manage” from the “Right Click” menu on the My Computer/This PC icon.
- A pop-up window will appear, similar to the one seen above. Select the ‘Device Manager’ option from the left pane.
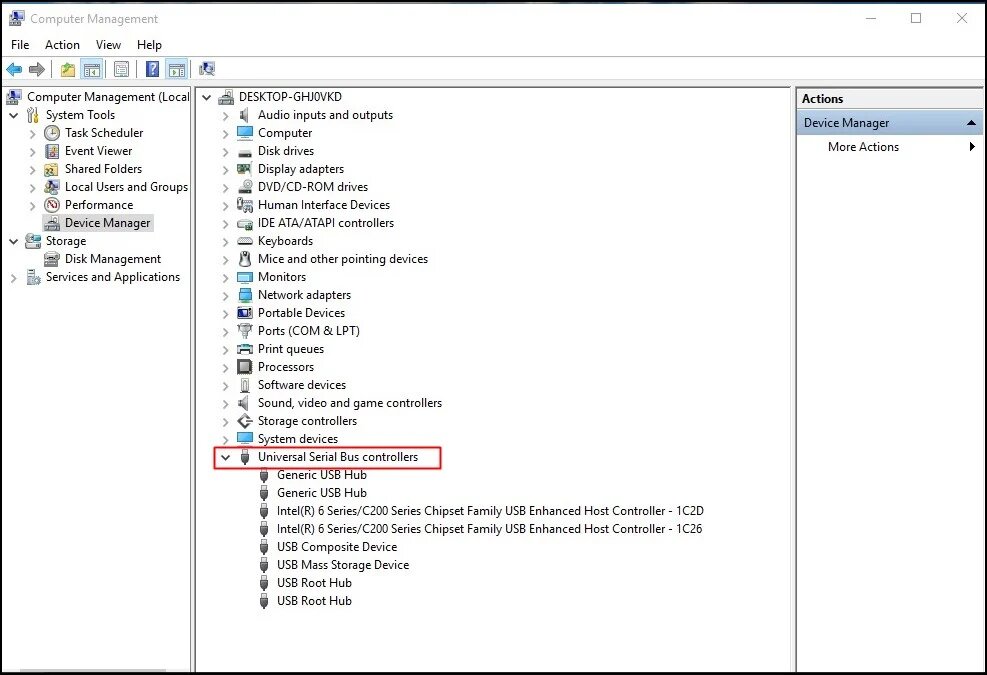
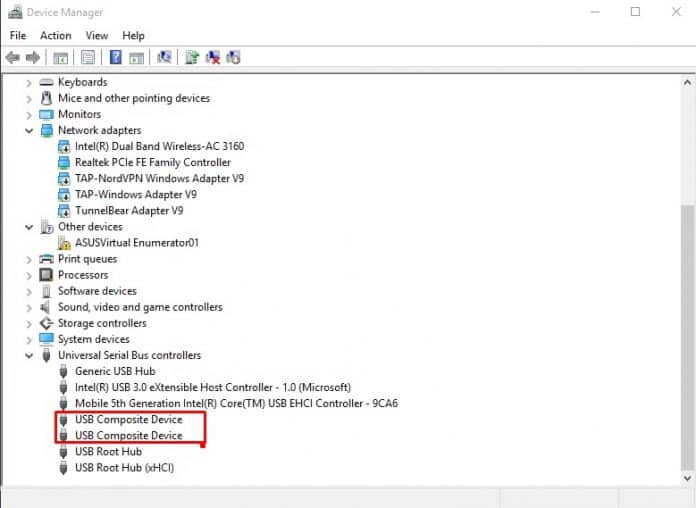
- You must now seek out Universal Serial Bus Controllers.
- Select all of the devices under Universal Serial Bus Controllers and disable them all with a right-click. Check if it works.
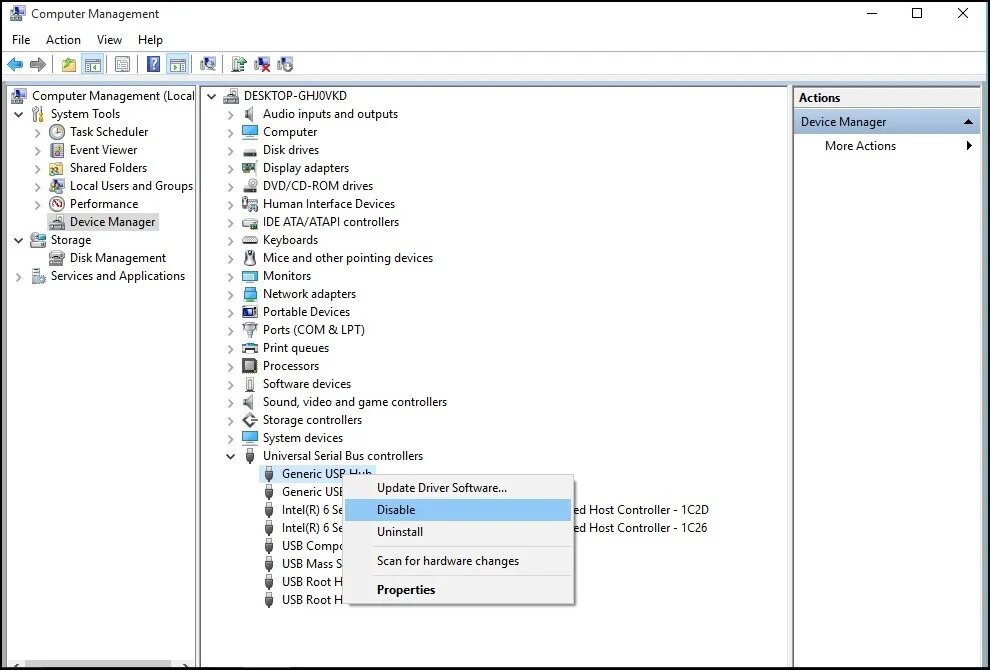
Restart your computer if the port was not working. Even if you reboot your computer, remember to enable that device afterward.
Uninstalling your USB Mass Storage Drivers
Although this is not the most suggested strategy, it is nonetheless useful. If you’re concerned about your computer’s security, you can delete the USB Mass Storage Drivers. This will disable USB access for the time being.
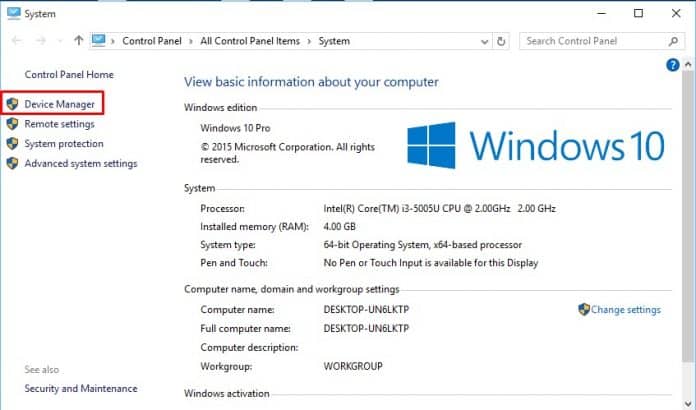
- First and foremost, go to the Device Manager.
- Expand the ‘Universal Serial Bus Controllers’ section of the Device Manager.
- Select ‘Uninstall‘from the right-click menu on the USB Port.
However, Windows will look for USB port drivers and will install them automatically, allowing your USB to function normally once more.
Taking Advantage of Third-Party Software
If you are still not pleased after examining all of the above processes and approaches, you will most likely need to install third-party software on your computer that will manually block your computer’s USB ports with a program software that you can download from here.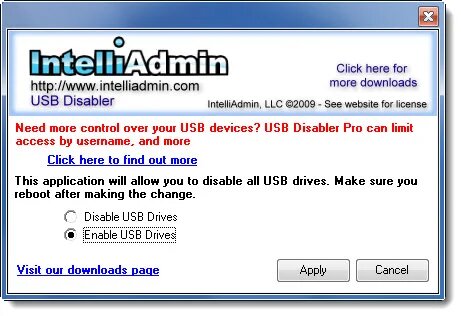
The software can be readily downloaded by following this link. Disable / Enable the USB Driver What can you do with the program? You can toggle the USB ports on and off on your PC.
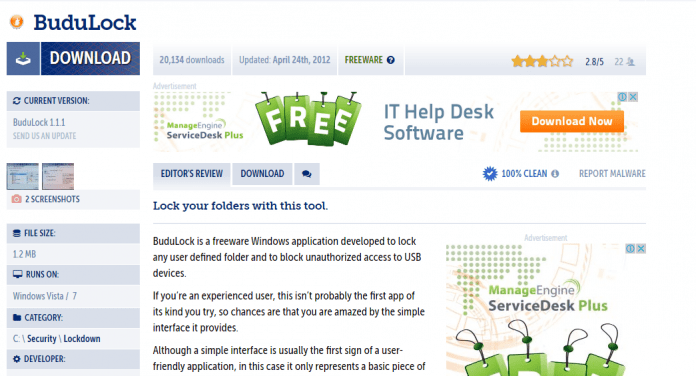
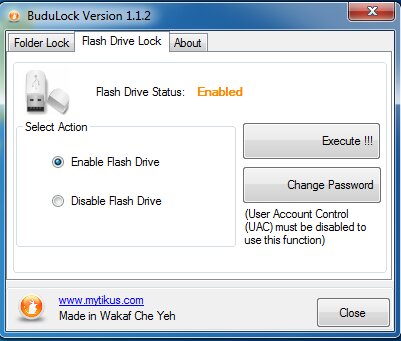
Utilizing BuduLock
It is a free program that allows you to lock any user-defined folder and prevent unwanted access to a USB device. Simply said, it allows you to disable USB ports and password-protect files. This serves as a safeguard. Let’s see how to put it to use.
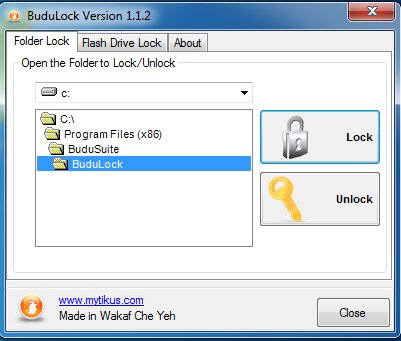
- To begin, download and install BuduLock on your Windows PC, then run it.
- You should now see a screen similar to the one below. Now, connect the USB device to your computer running Windows.
- Select the “Flash Drive Lock” option, which is situated right beneath the Folder lock option.
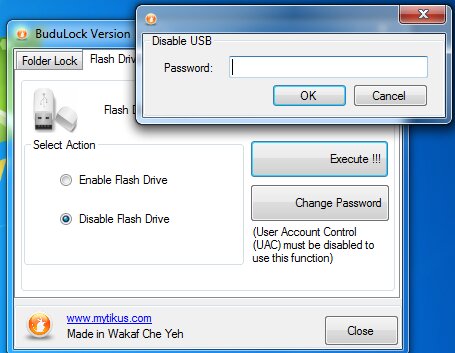
- Now you must disable the USB port by clicking Disable Flash Drive. Simply choose the option “Enable Flash Drive” and enter your password to turn it on.
That concludes our discussion. This is the simplest method for blocking USB ports on a Windows PC.
Conclusion:
Finally, these are the top five methods for enabling or disabling USB ports in Windows. If you have any questions about the procedures given above, feel free to contact us. I hope you enjoyed reading our article. Don’t forget to send us your suggestions. Goodbye!


